Flow Editor
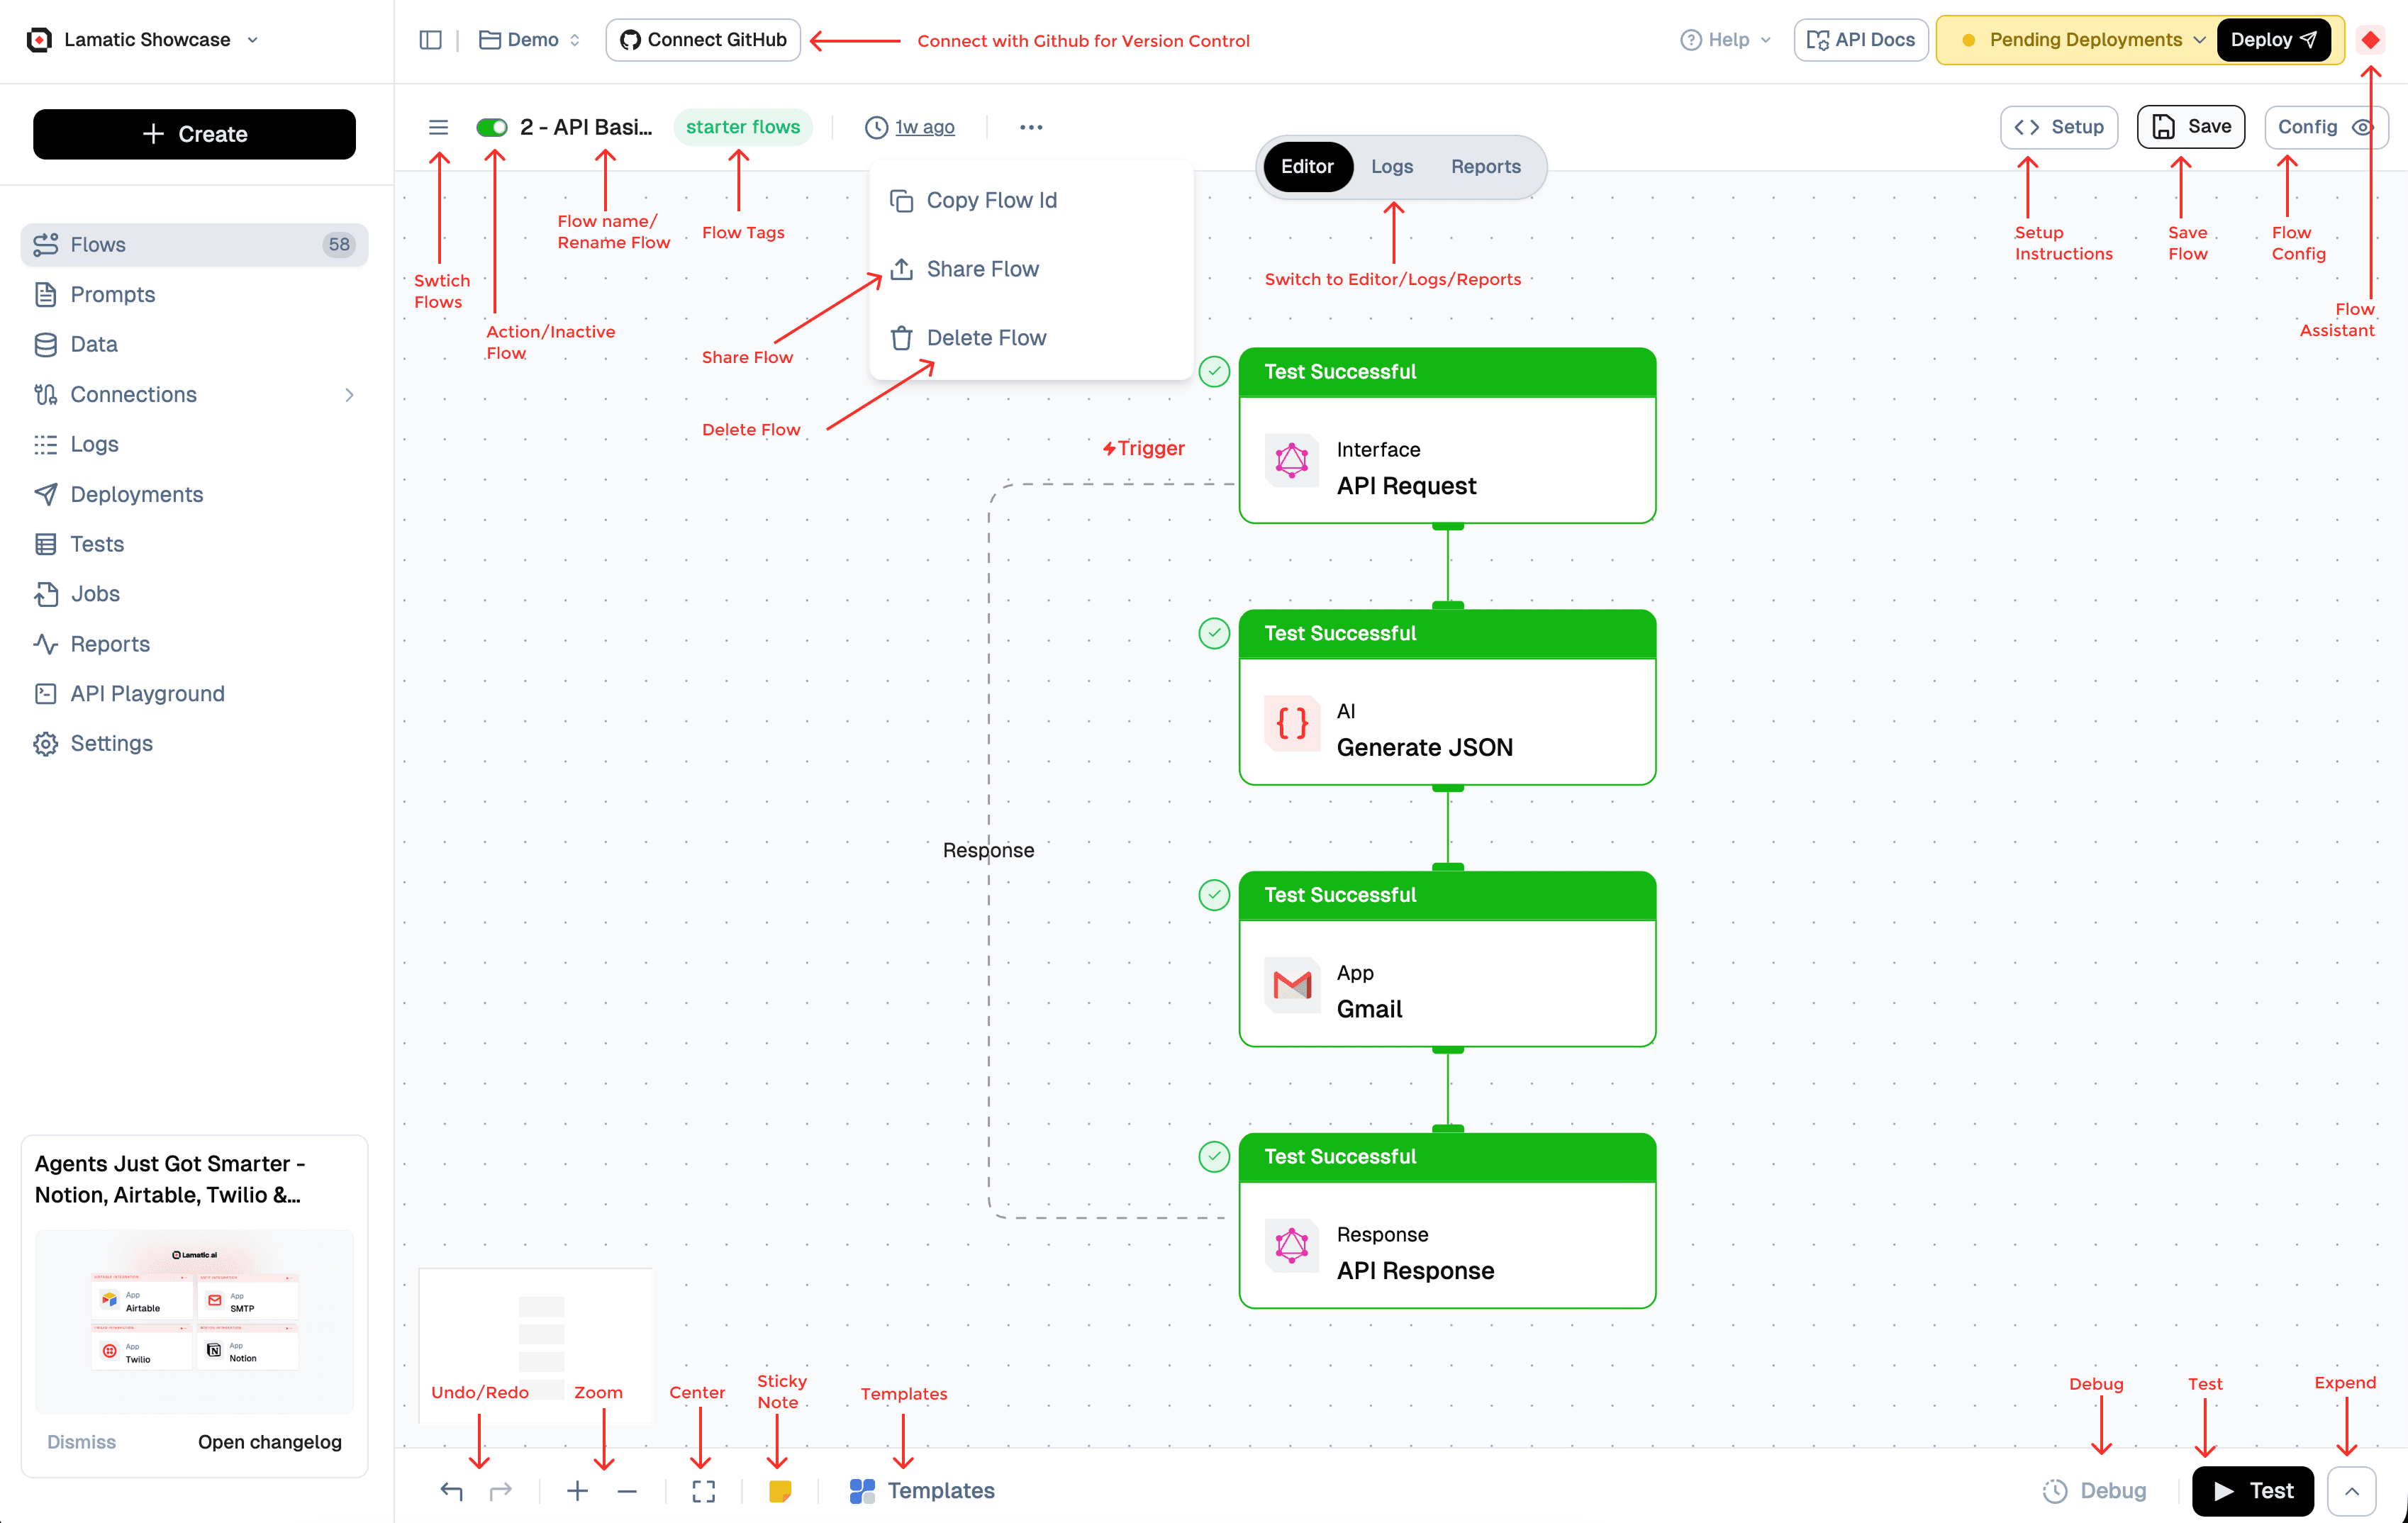
The Editor provides a comprehensive interface for building and editing GenAI flow with an intuitive flowchart approach. This guide walks through key features and methods to help you utilize the Editor effectively.
Node Actions
Nodes are essential components of any flow. Each node carries out a unique function using defined inputs and configurations. Here’s how to work with nodes:
Adding Nodes
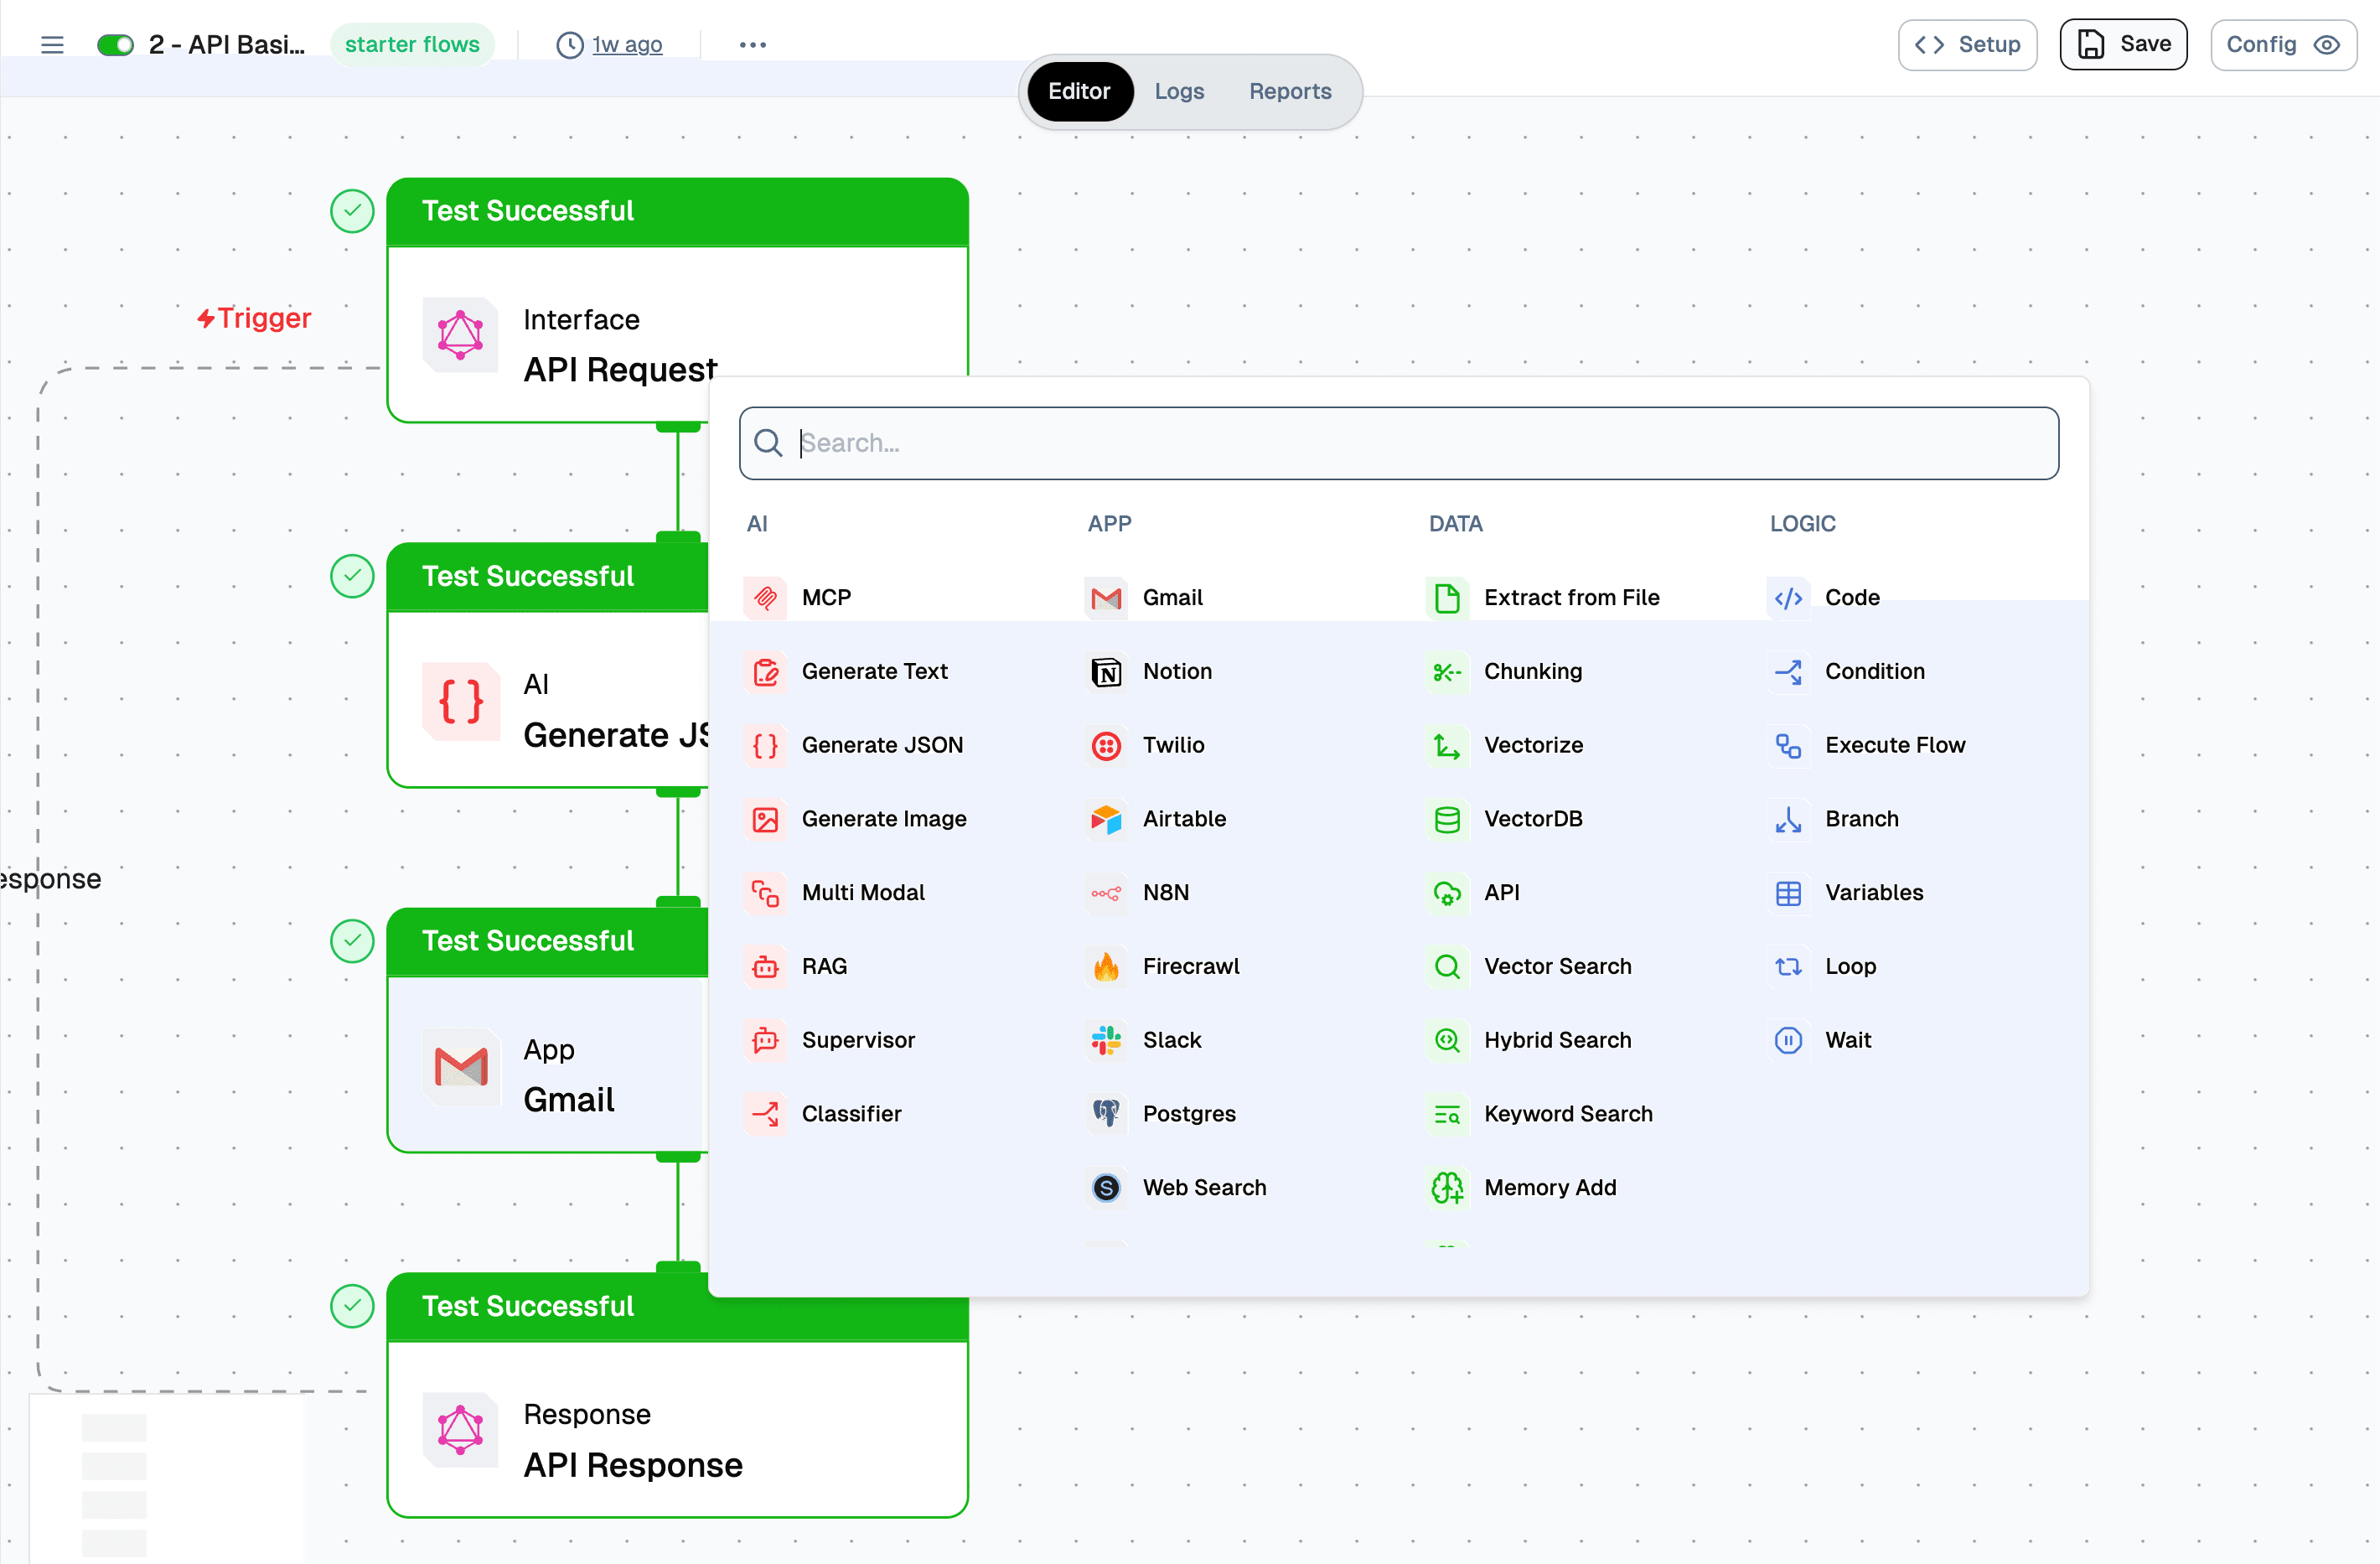
Method:
- Locate the ➕ icon in empty spaces or when hovering over connecting lines.
- Click the ➕ icon to open the node selection menu.
- Select the desired node type from the menu.
- The chosen node will be added to your flow at the selected location.
Configuring Nodes
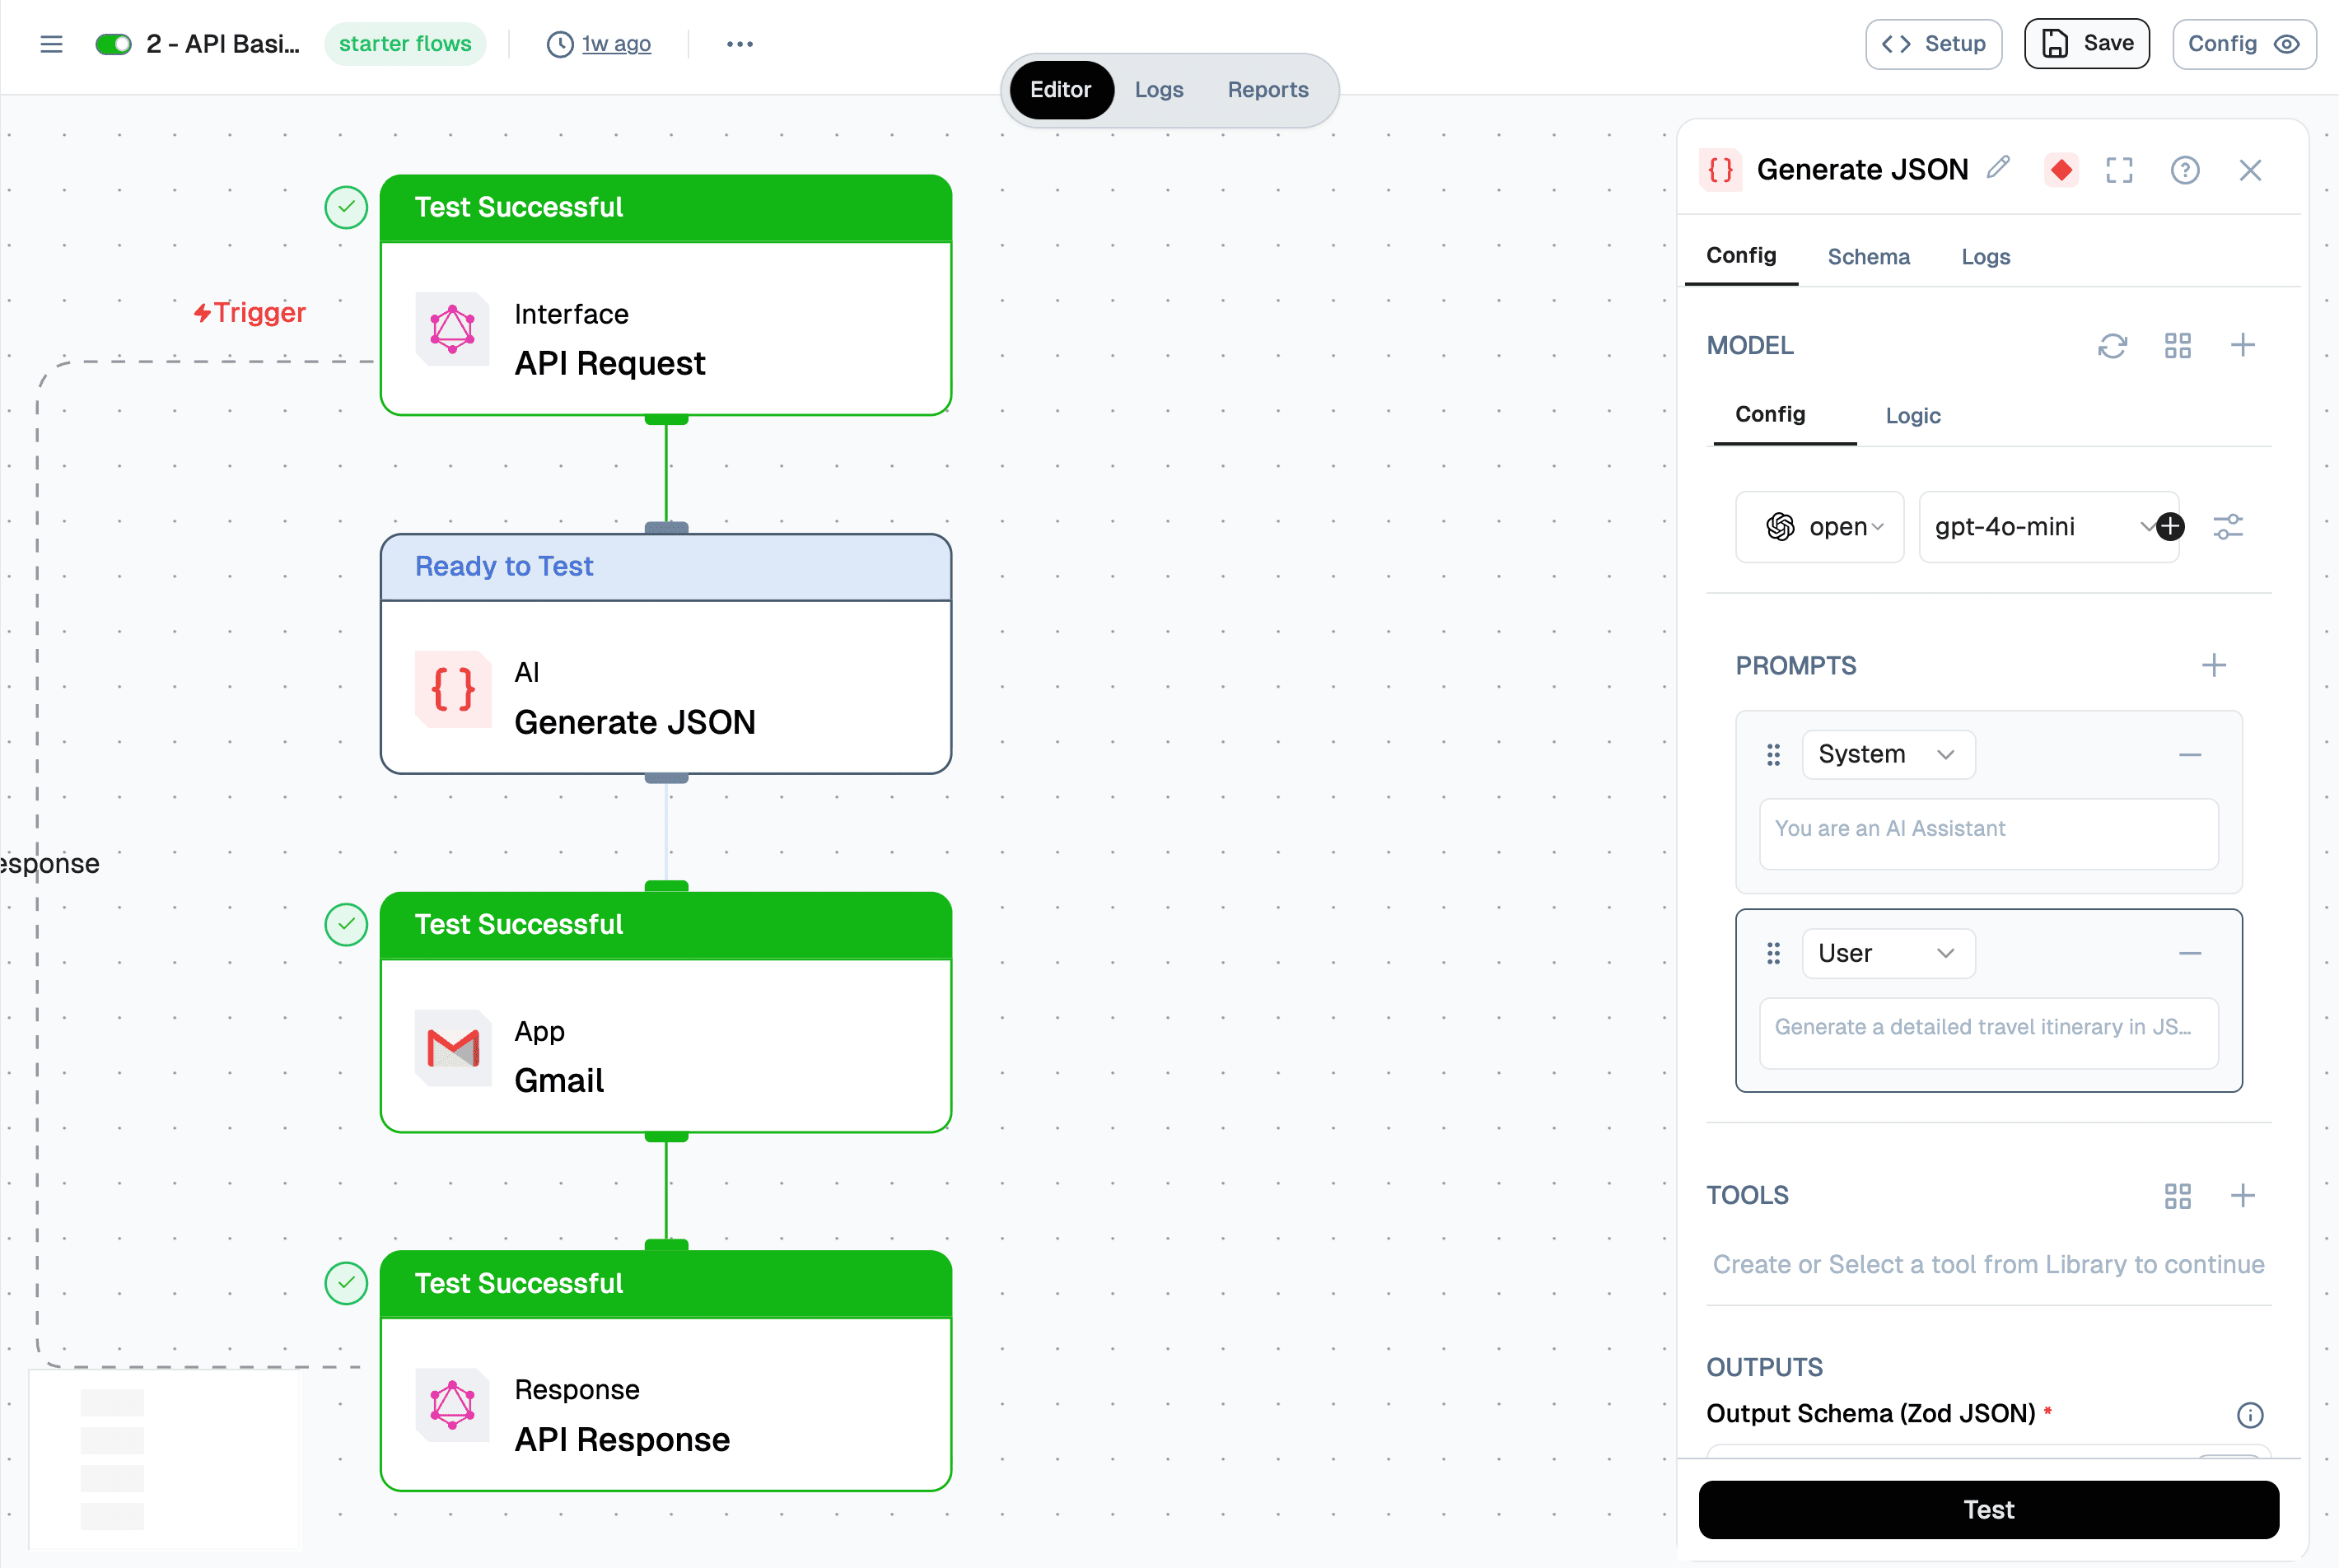
Method:
- Click on a node in your flow to select it.
- The configuration panel will appear on the right side of the screen.
- Modify settings (e.g., input parameters, output options) as needed.
- Changes apply automatically in real-time.
Reordering Nodes
Method:
- Click and hold the node you want to move.
- Drag the node to its new position within the flow.
- Release the mouse to place the node; the flow will adjust automatically.
- Reordering nodes enables access to upstream variables, improving data flow between nodes.
Config
 The Config tab provides a low-code method to define flows using a YAML-like syntax, offering flexibility similar to GitHub Actions.
Method:
- Go to the Config tab in the Editor.
- Edit YAML directly in the text area to specify nodes, properties, and connections.
- Follow YAML syntax to maintain proper structure.
- Changes automatically sync with the visual representation of your flow.
- Switch between visual and Config views to see updates in real-time.
Debugging
The Editor includes robust debugging tools to ensure your flows work as expected.
Individual Node Debugging
Method:
- Select the node you wish to debug.
- Find the debug option in the node’s configuration panel.
- Click the debug button to execute the node independently.
- Review outputs and any error messages in the debug console.
- Adjust node configurations based on the results.
Full Flow Testing
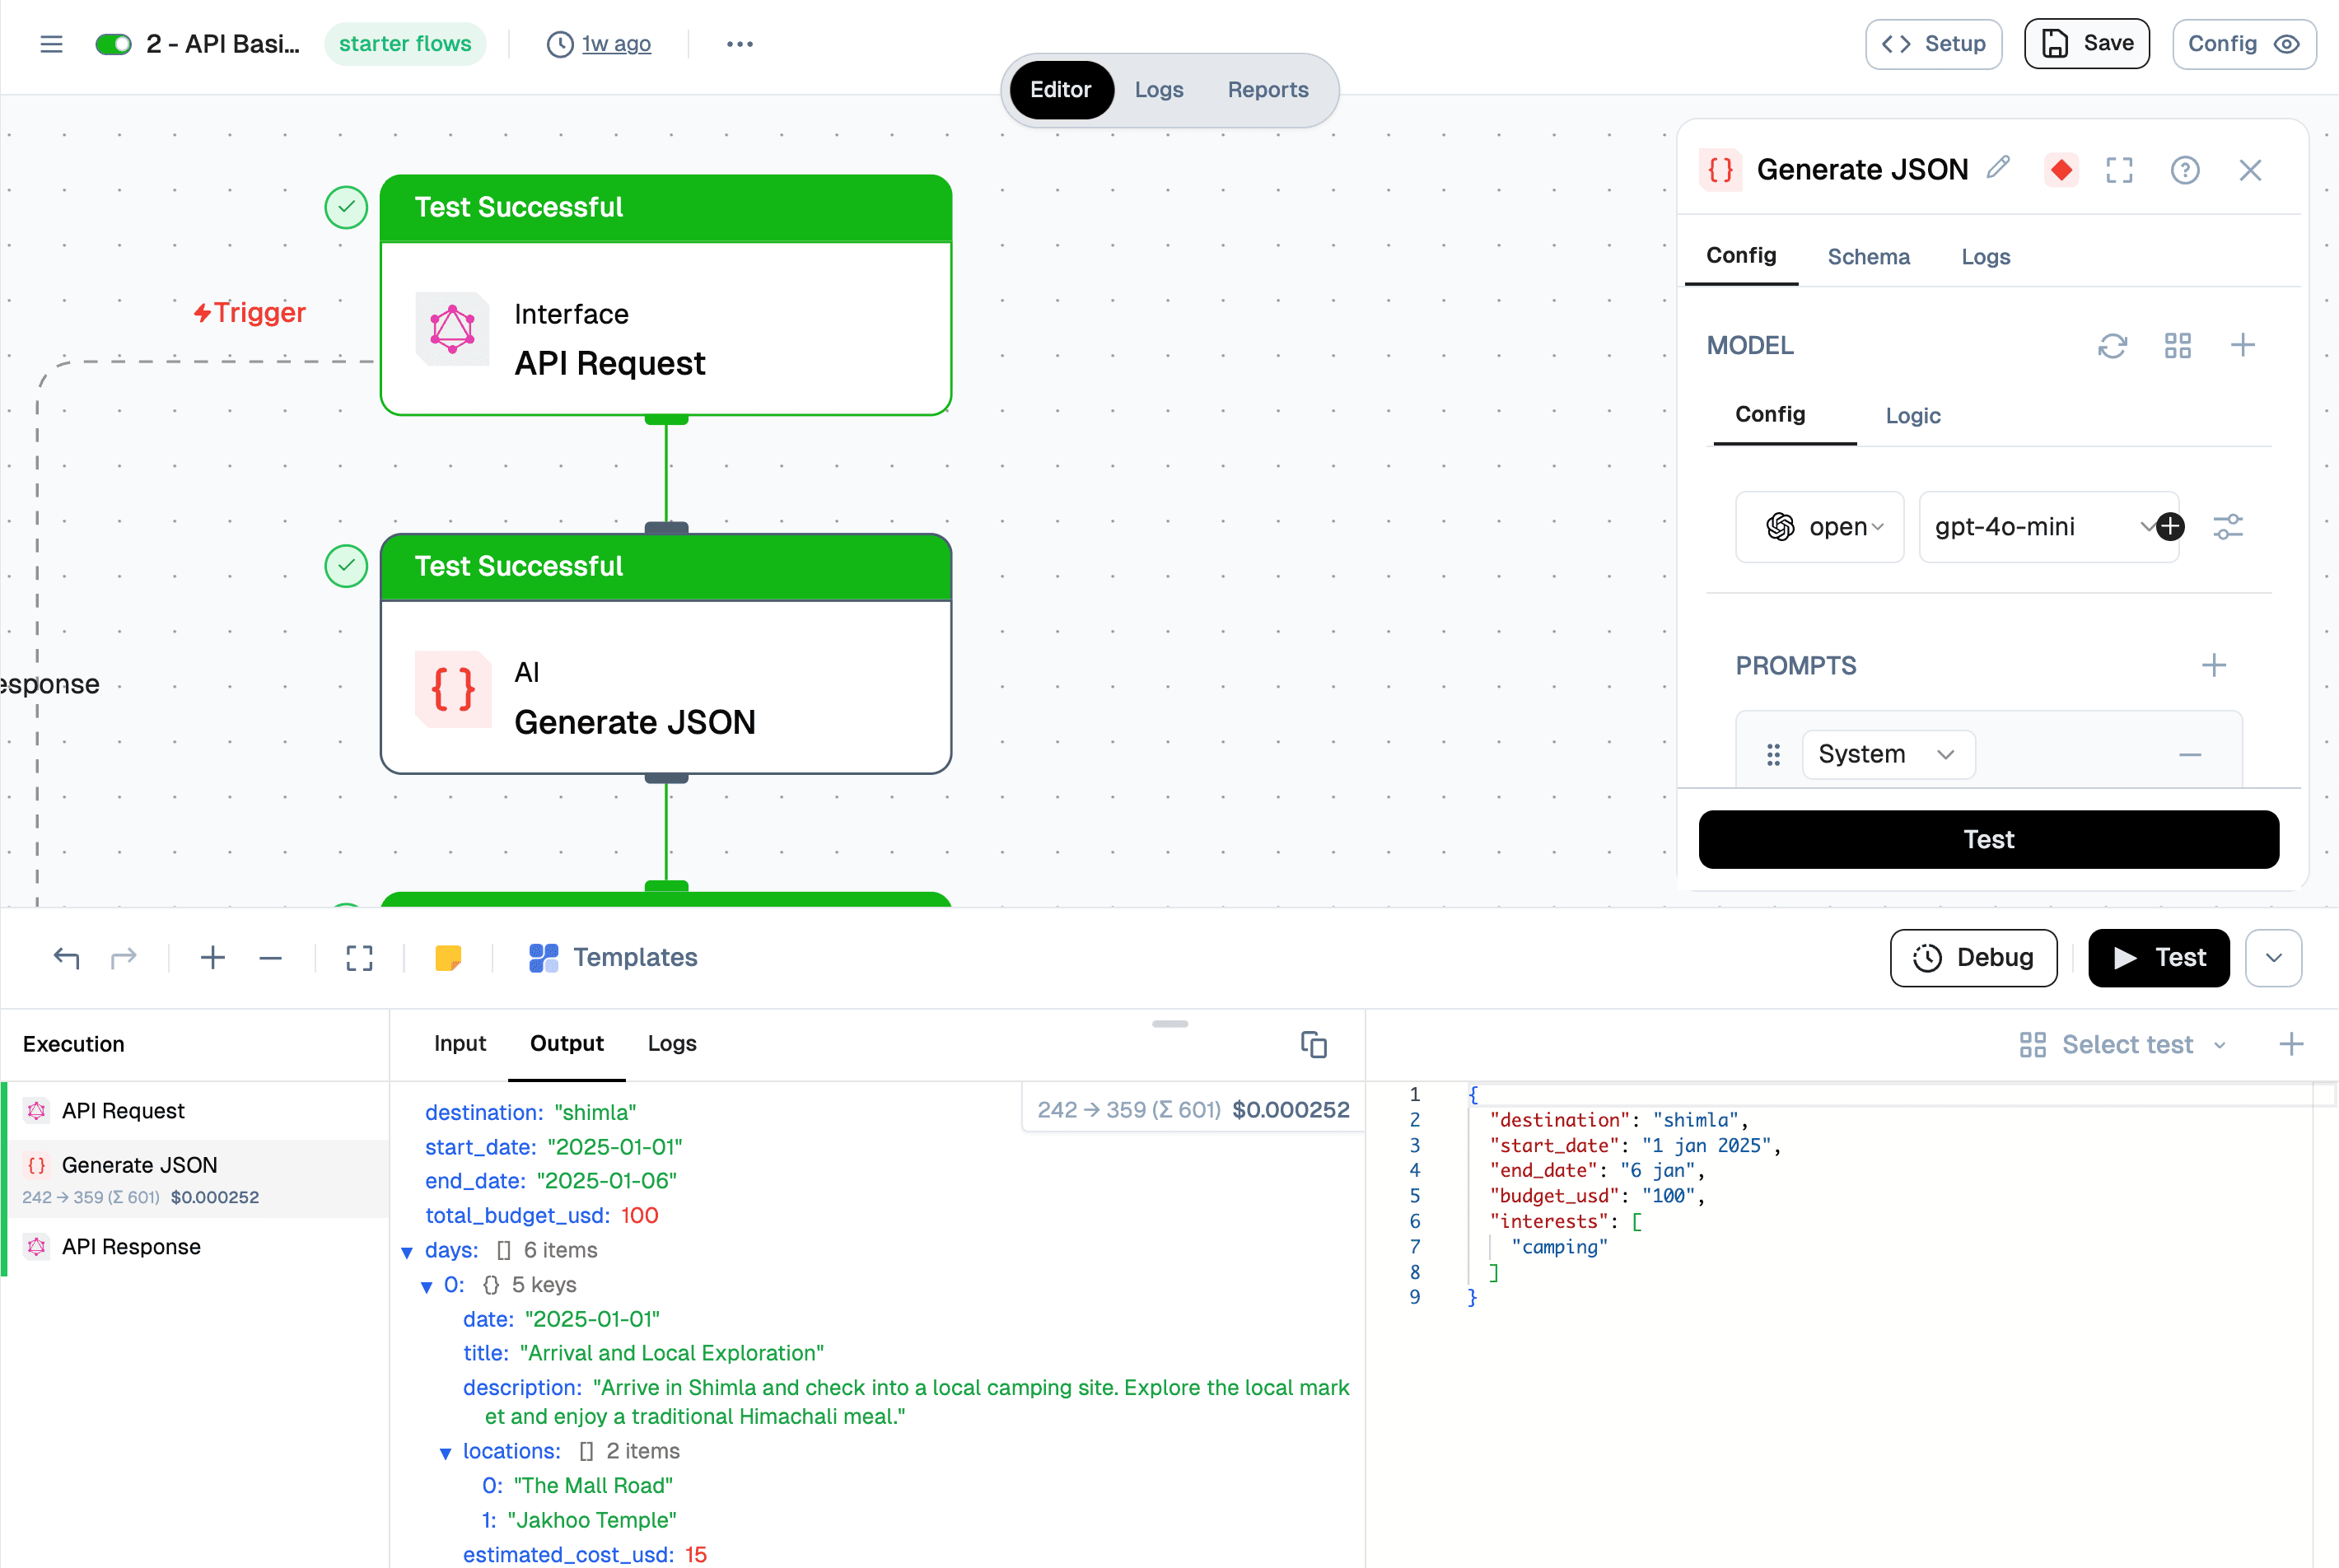
Method:
- Click "Test" in the main toolbar to execute the entire flow.
- Observe each node’s progress in the debug console.
- Review the final output and any intermediate results.
- Adjust nodes as needed to optimize performance.
Deployment Testing
Method:
- Open deployment settings for your project.
- Configure automated tests that run before each deployment.
- Set success criteria (e.g., expected outputs, performance).
- Deploy your flow; if tests fail, deployment will roll back.
- Review test results, make changes, and redeploy as needed.
Saving and Sharing
Save and share flows to maintain work continuity and foster collaboration.
Saving Flows
Method:
- Click the "Save" button in the main toolbar.
- Optionally, add a commit message to document your changes.
- Save regularly, as autosave is not supported.
Sharing Flows
Method:
- Click "Share" in the Editor to generate a unique URL.
- Copy and distribute this URL within your organization.
- Recipients can access and edit shared flows, enhancing collaborative efforts.
Creating Templates
Method:
- Open the flow you wish to template.
- Choose "Create Template" from the Editor menu.
- Select sharing scope:
- Organization: Share within your team.
- Public: Publish to the hub for broad access.
- Add a title and description to guide other users.
- Click "Create" to finalize and publish.
Duplicating Flows
Duplicate flows to create variations or backups without affecting the original.
Duplicating Flows
Method:
- On the flow dashboard, find the flow you wish to duplicate.
- Click the three-dot menu icon to open additional options.
- Choose "Duplicate" to create a copy of the flow.
Deployment
Deploy your completed flow to make it operational.
Deploying Flows
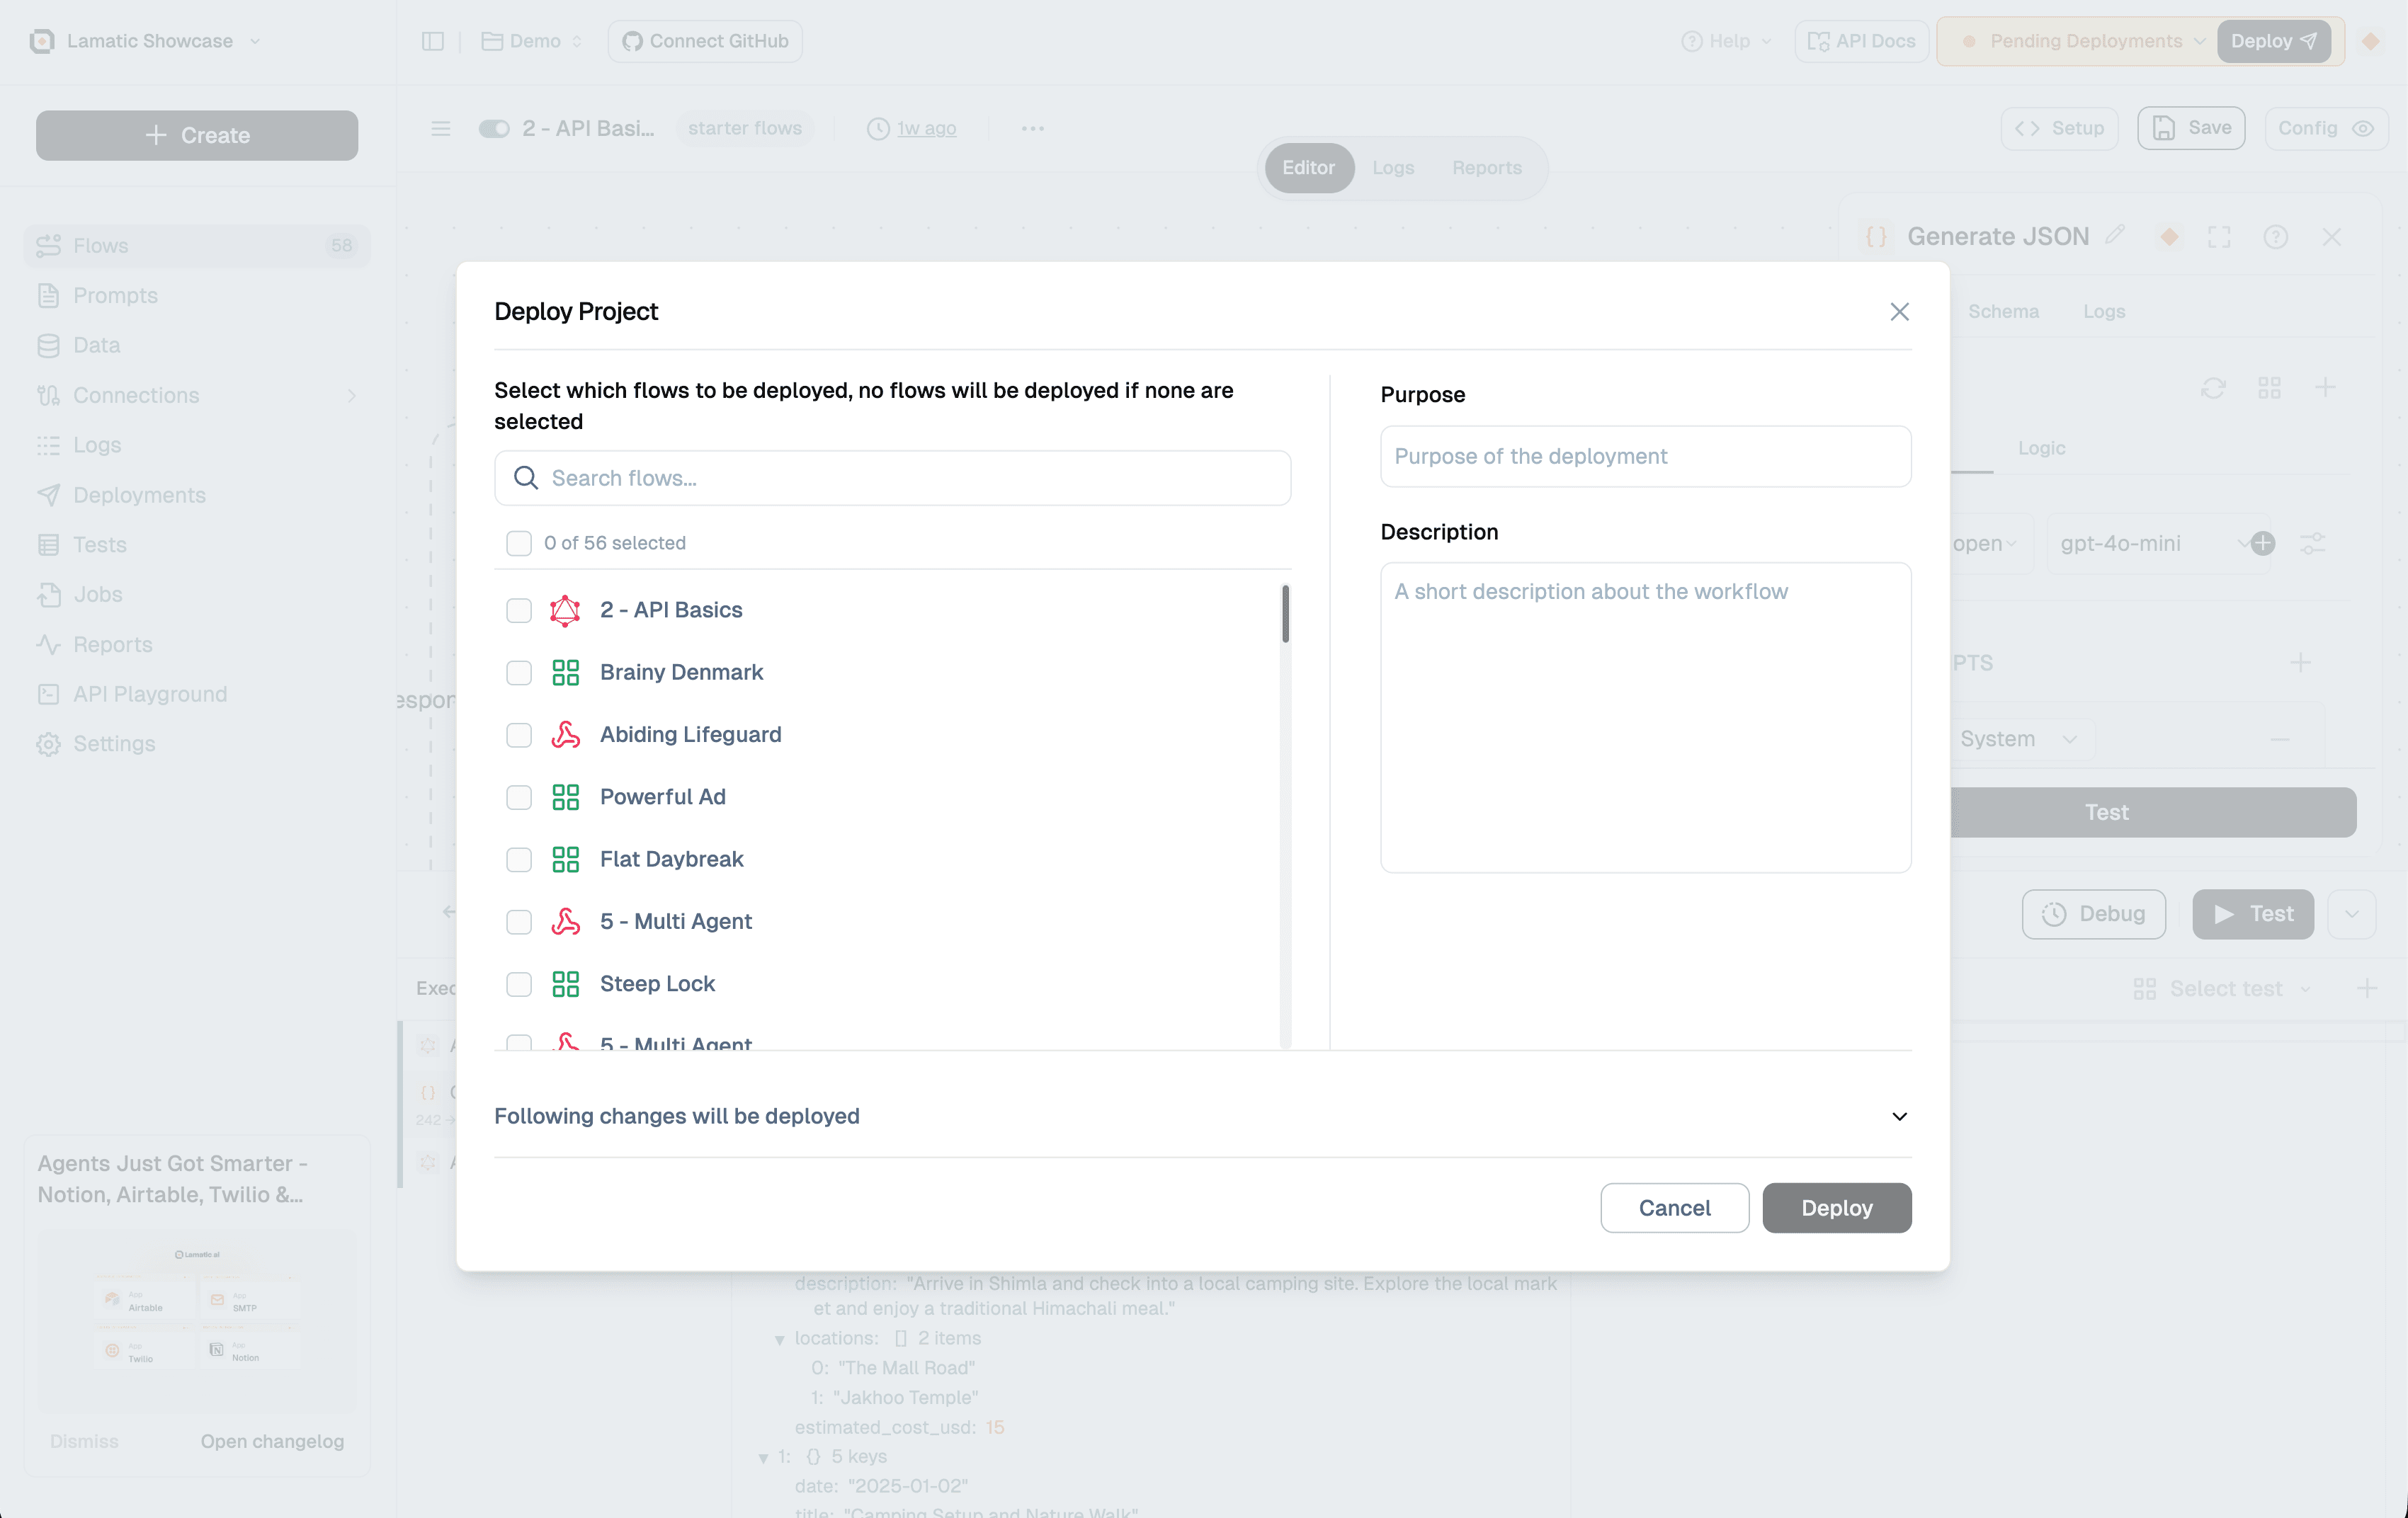
Method:
- Ensure all changes are saved and tested.
- Click "Deploy" in the main toolbar.
- Confirm deployment in the summary view, which lists flows and changes.
- Monitor progress and resolve any errors or warnings.
Flow Activation
Method:
- Go to the project dashboard or flow management section.
- Find the list of deployed flows.
- Toggle the activation switch to enable or disable specific flows.
Integration Setup
Method:
- After deployment, open the "Integration" or "API" section in your dashboard.
- Follow the provided instructions for integration, including:
- API endpoint details
- Authentication methods
- Sample code snippets in various languages
- Use these resources to integrate your GenAI flow with external applications.
By following these step-by-step methods, you can effectively utilize the Editor to create, configure, debug, and deploy GenAI flows, maximizing the potential of your AI-driven projects.