Build a RAG-Powered Chatbot with GitHub Docs
This guide will show you through building a chatbot that uses Retrieval-Augmented Generation (RAG) to answer questions from GitHub-hosted MD documentation using Lamatic AI.
What You Will Learn
- How to extract content from MD documentation
- How to upload and index documents in Lamatic AI
- How to build a chatbot using RAG
- How to embed the chatbot into a website
Prerequisites
Before starting, ensure you have:
- A GitHub repository with
.mddocumentation - Access to Lamatic Studio (opens in a new tab)
Architecture Overview
To implement Retrieval-Augmented Generation (RAG) utilizing GitHub documentation, we need to construct two distinct flows:
- GitHub Indexing Flow: Encompasses webhook integration for data acquisition from GitHub and subsequent RAG implementation
- Chat Widget Flow: Facilitates the RAG chatbot functionality
Part 1: GitHub Indexing Flow
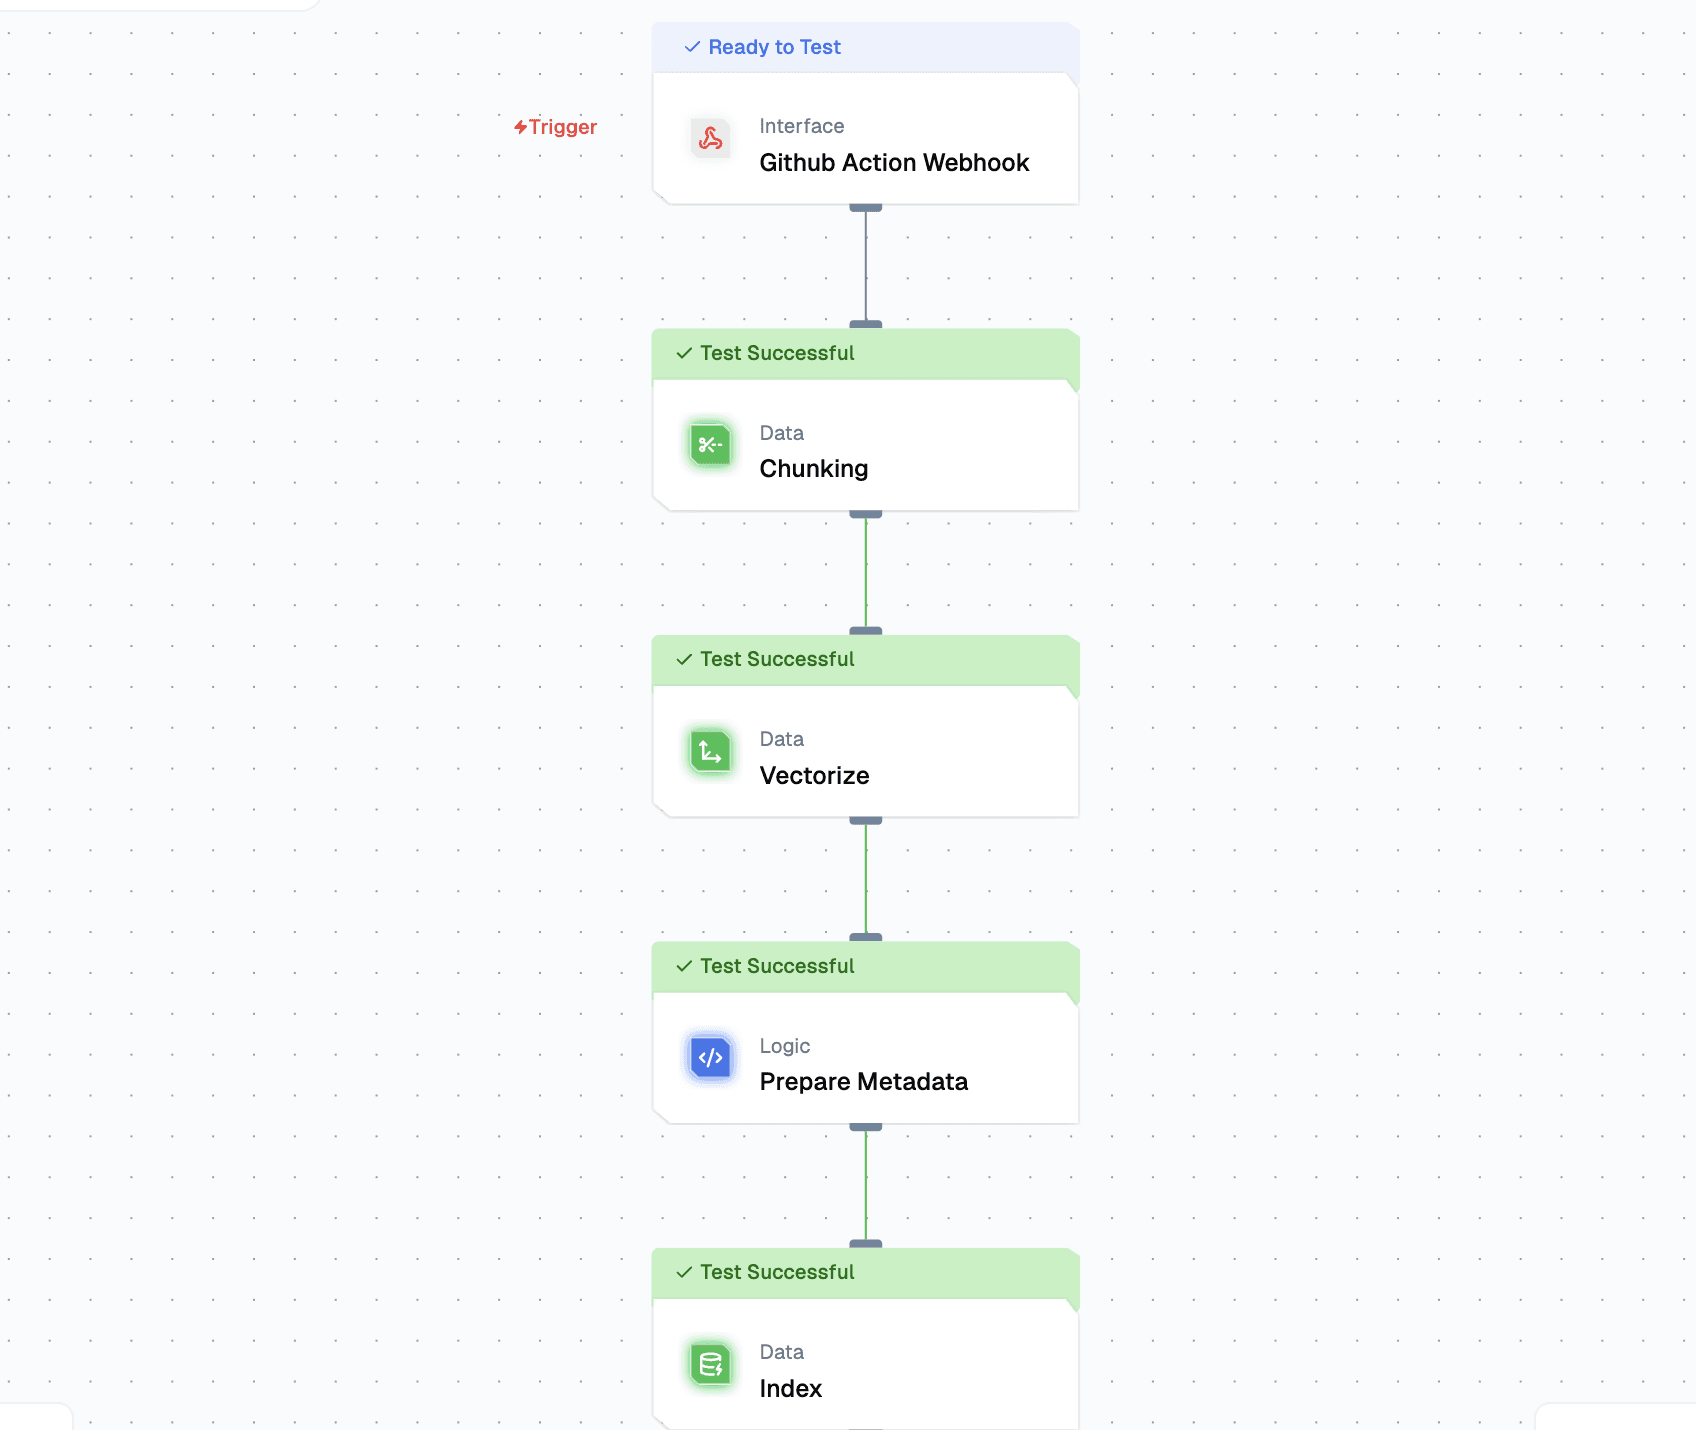
The implementation of this workflow utilizes the following nodes:
- Webhook Node: Configured as the Trigger Node
- Chunking Node: For content segmentation
- Vectorize Node: To perform data chunk transformation into numerical vector representations via an embedding model
- Code Node: For metadata transformation
- Index Node: For data storage within the vector database
Step 1: Create the Flow
- Go to Lamatic Studio
- Create a new Flow from Scratch
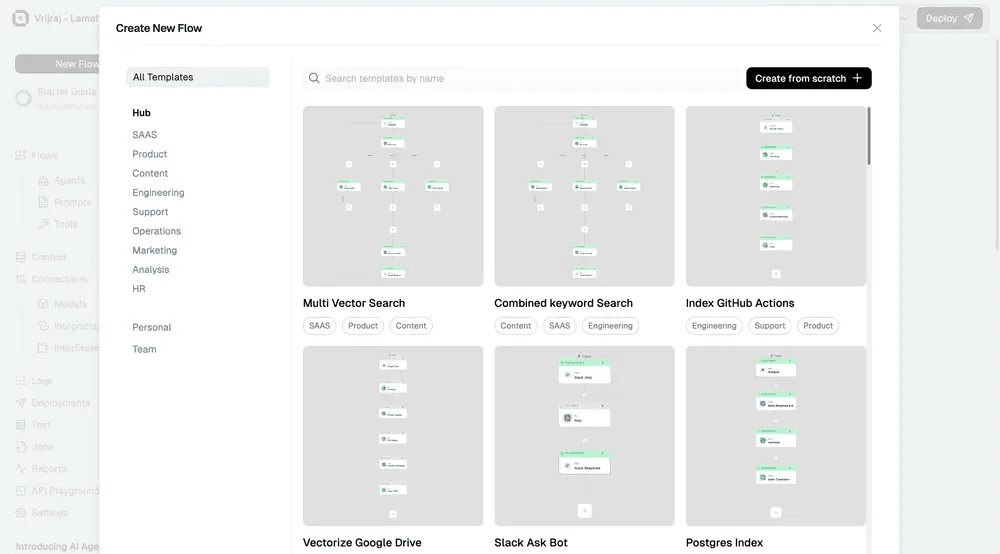
- Update the Flow name:
GitHub Indexing Flow
Step 2: Configure Trigger Node
- Click on the Trigger Node and use Webhook as the trigger Node
- In the following sequence, add:
- Chunking Node
- Vectorize Node
- Code Node
- Index Node
Step 3: Configure Chunking Node
Select the Chunking Node and configure:
- To add text to a chunk, click the + icon and add:
{{triggerNode_1.output.content}} - Number of Characters:
1000 - Characters that Overlap:
100 - Chunking Method:
Recursive Character Text Splitter - Separators:
\n\n \n
Node names might be different based on your setup. Adjust accordingly.
Step 4: Configure Vectorize Node
- Texts to vectorize:
{{chunkNode_860.output.chunks[:].pageContent}} - Embedding Model Name:
Gemini - Model:
gemini-embedding-exp-03-07
Node names might be different based on your setup. Adjust accordingly.
Step 5: Set Up Code Node
- Change the name to:
Prepare Metadata - Include the following JavaScript code:
let vectors = {{vectorizeNode_814.output.vectors}};
let metadataProps = [];
let texts = {{chunkNode_860.output.chunks}};

for (const idx in vectors) {
    let metadata = {}
    metadata["content"] = texts[idx].pageContent;
    metadata["file_name"] = {{triggerNode_1.output.filename}};
    metadataProps.push(metadata)
}

output = {"metadata": metadataProps, "vectors": vectors};Node names might be different based on your setup. Adjust accordingly.
Step 6: Set Up Index Node
Configure the Index Node with:
- Vector DB: Choose your preferred vector database
- Input Vectors:
{{codeNode_443.output.vectors}} - Input Meta Data:
{{codeNode_443.output.metadata}} - Input Primary Key:
file_name
Step 7: Deploy and Get Credentials
- Save the Flow
- Deploy the Flow and get the Webhook URL from the Setup Guide
- Acquire the API Key from Settings > API Keys
- Use the Webhook URL and API Key for GitHub Actions configuration
Part 2: GitHub Repository Setup
Step 1: Create GitHub Repository
Initialize a new Git repository and populate it with Markdown files, or fork an existing repository with documentation.
Step 2: Configure Repository Secrets
- Go to Repo Settings
- Navigate to Secrets and variables in the Security section (left sidebar)
- Select Actions

- Establish two variables within Repository secrets:
WEBHOOK_KEYWEBHOOK_URL
Step 3: Create GitHub Action
- Go to Actions, then select "Create new Flow"
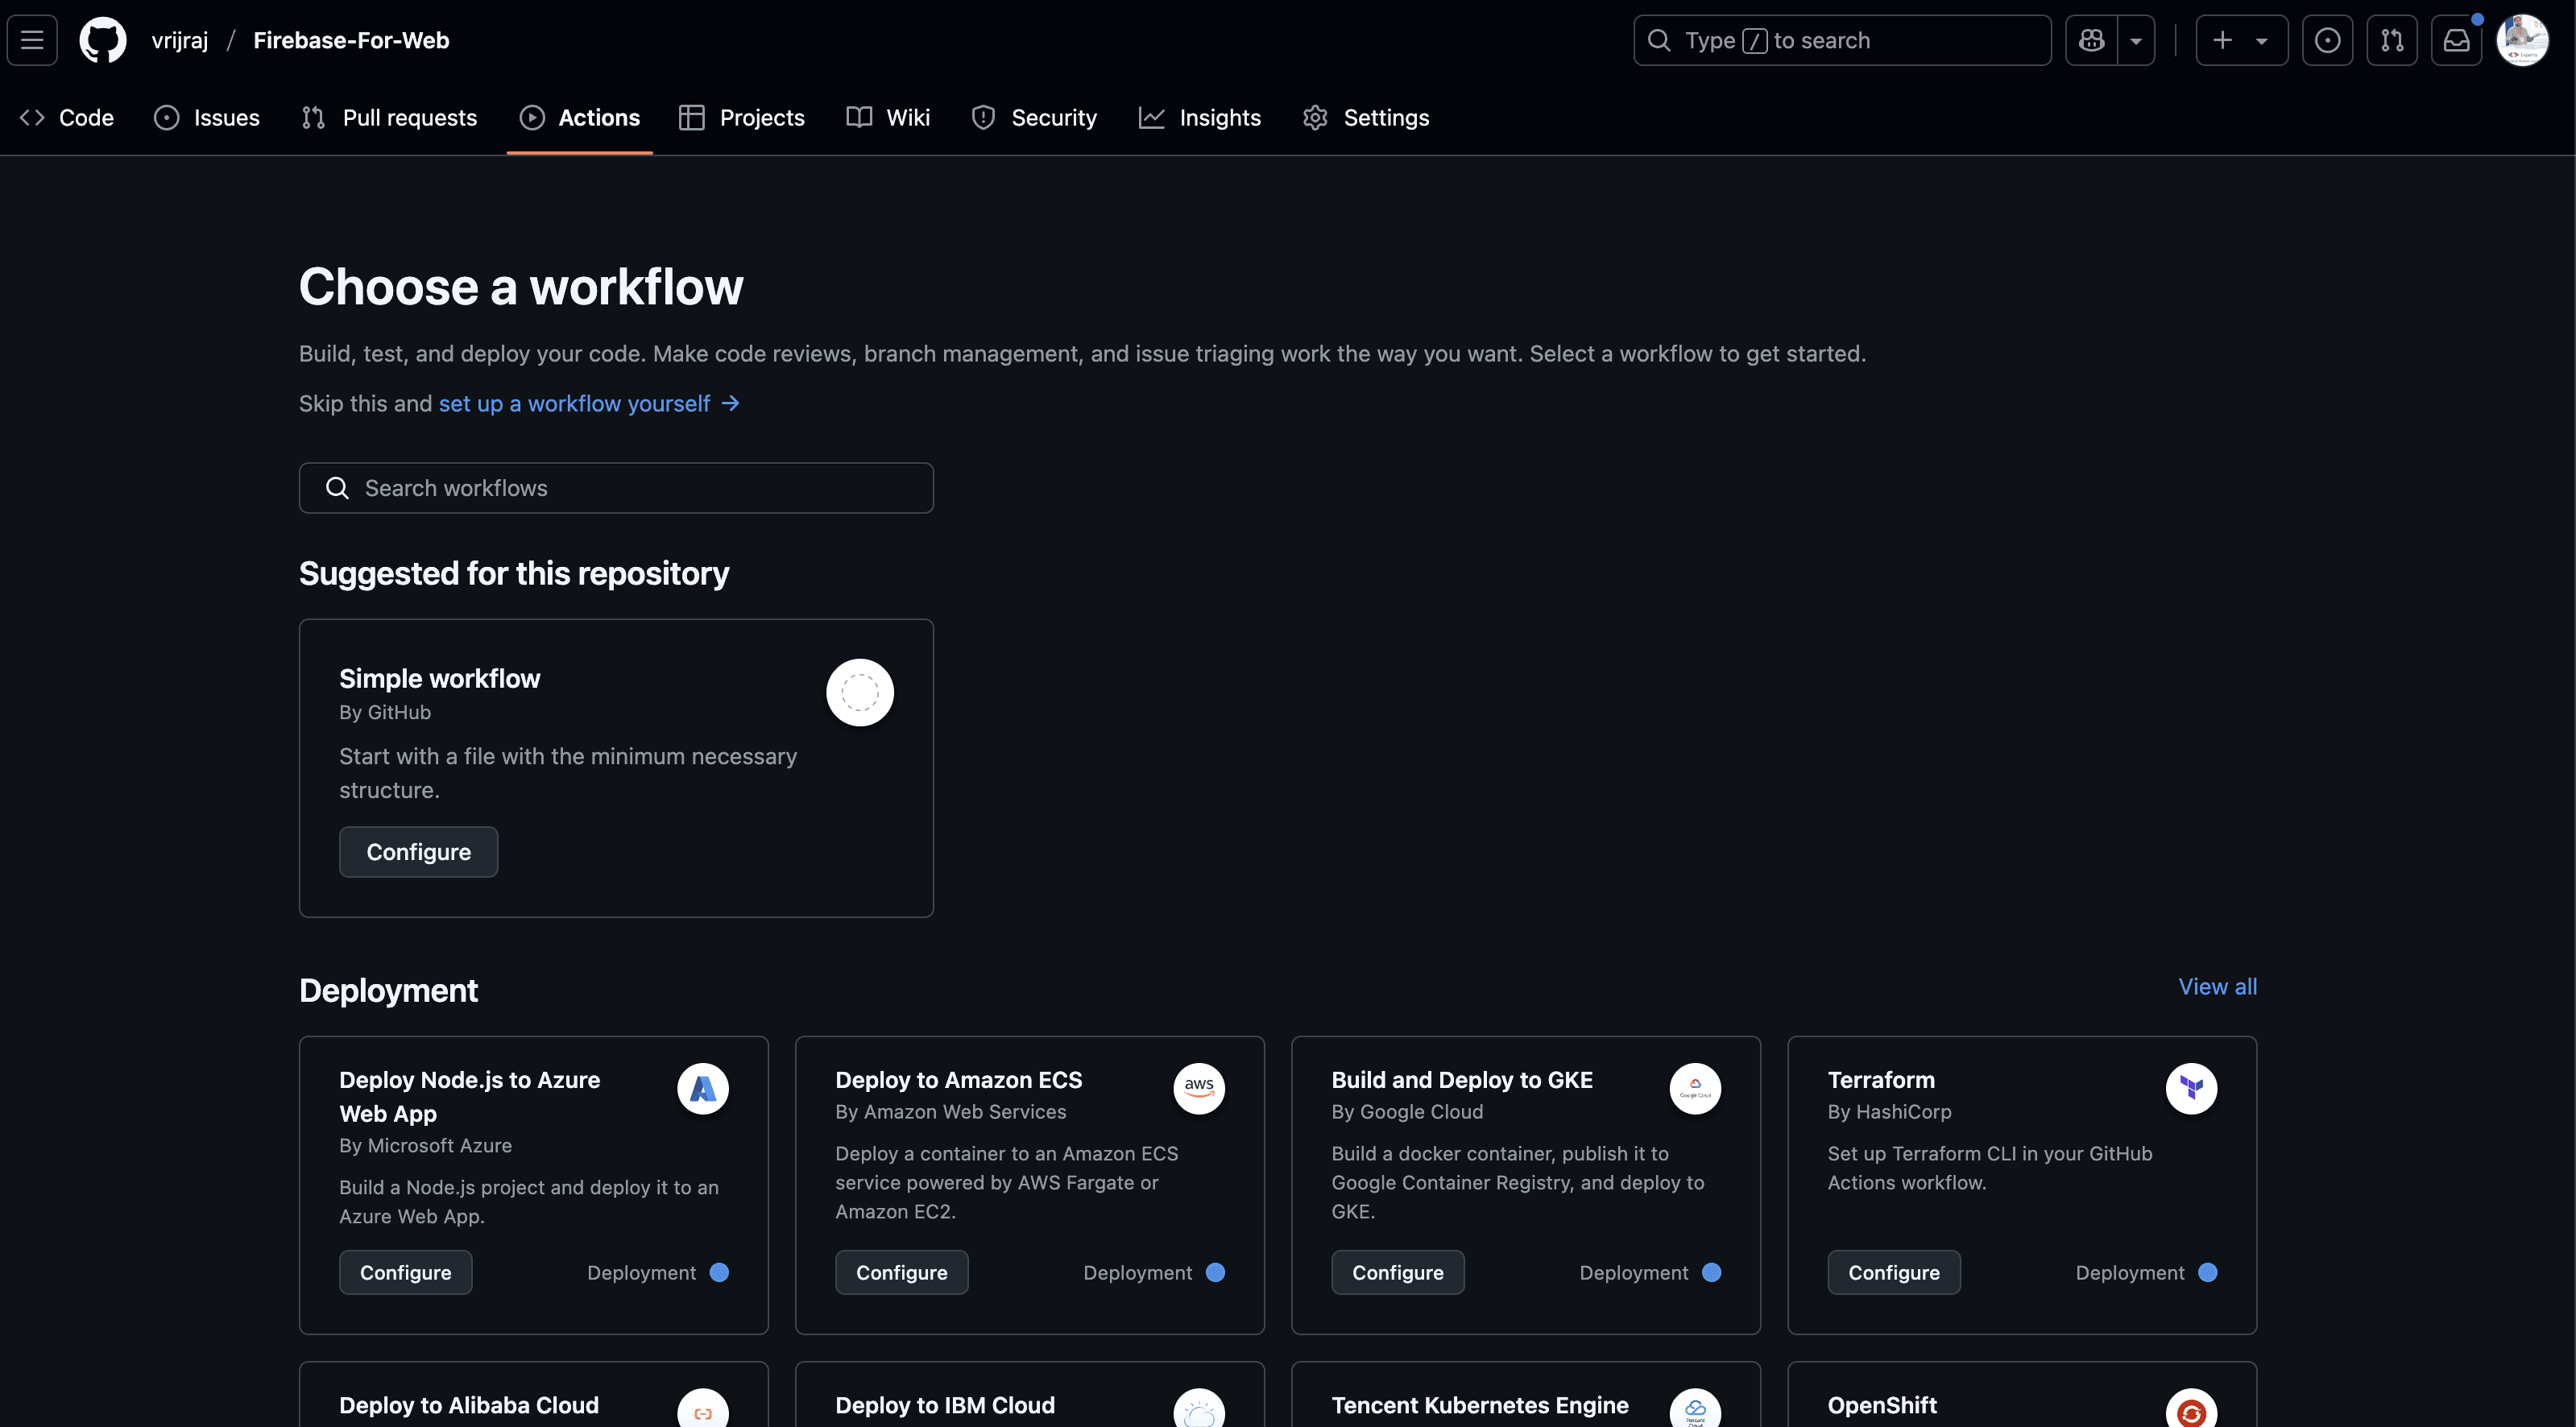
- Choose the "Simple workflow by GitHub" option
- Click the Configure button
- Update the file name:
send-to-lamatic.yml
Step 4: Add YAML Configuration
name: Send File Changes

on:
  push:
    branches:
      - main  # Adjust to your branch as necessary
    paths:
      - '**.md'  # Only trigger for changes in .md files

jobs:
  send-changes:
    runs-on: ubuntu-latest

    steps:
    - name: Send File Changes to Webhook
      uses: Lamatic/Index-to-lamatic@v1.6
      with:
        webhook_url: ${{ secrets.WEBHOOK_URL }}
        webhook_key: ${{ secrets.WEBHOOK_KEY }}
        github_ref: ${{ github.ref }}
        file_type: "md"
        mode: "incremental"  # or "full-refresh"
        verbose: "true"  # or "false"
Step 5: Commit Changes
Commit the changes to activate the workflow.
When you modify an MD file, the Lamatic webhook automatically calls and converts the information into vectors. You can view the logs and vector data in Lamatic Studio.
Part 3: Create Chat Widget Flow
The implementation utilizes these nodes:
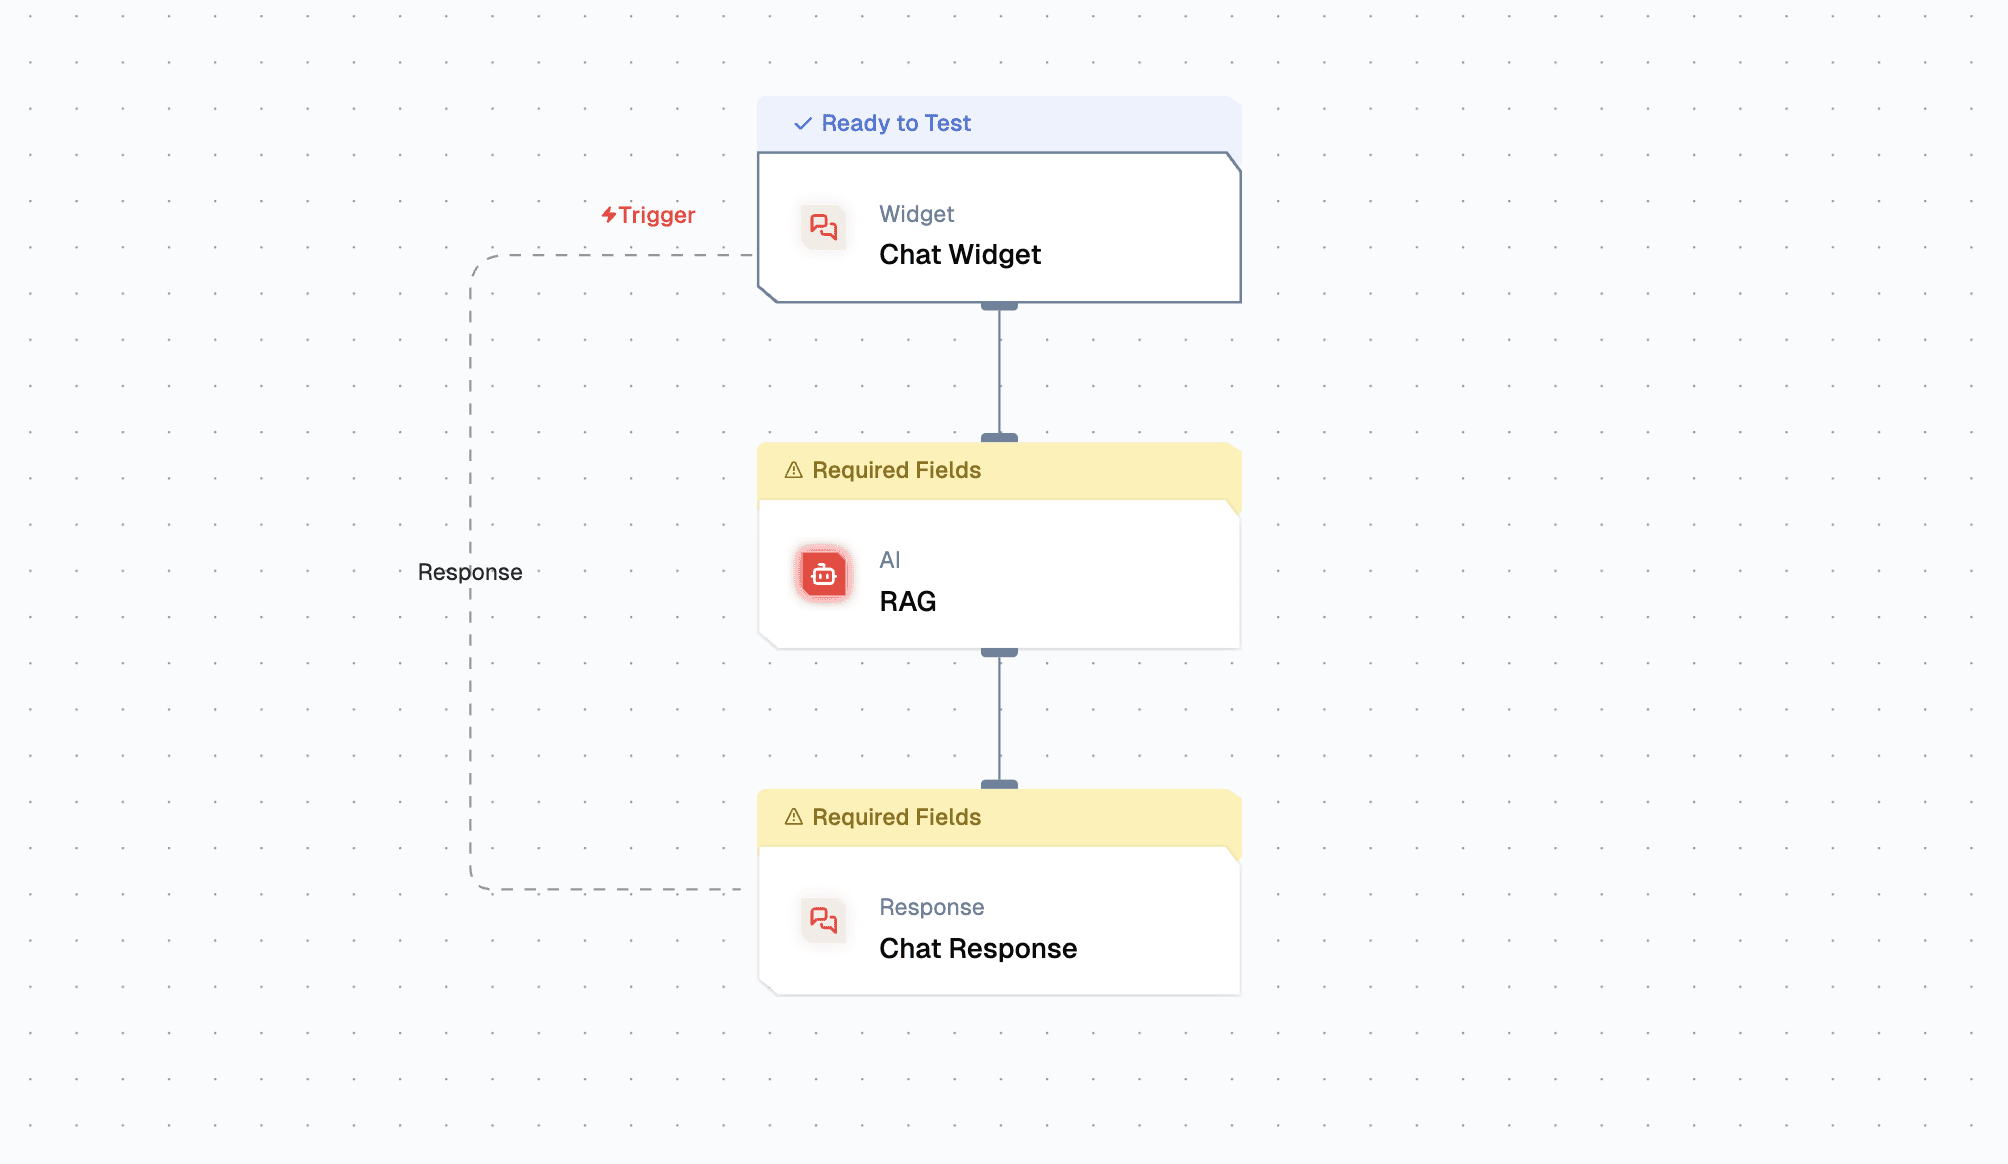
- Chat Widget: As the Trigger Node
- RAG Node: For RAG Response
Step 1: Create Chat Flow
- Create a Flow from Scratch
- Rename as
Github AI Chatbot
Step 2: Configure Chat Widget
Configure the Chat Widget properties:
- Allow domain settings
- Interface properties (default message, color theme, etc.)
Step 3: Add and Configure RAG Node
- Add RAG Node
- Configure the node:

- Use
gemini-embedding-exp-03-07embedding model (same as before) - Use the Gemini Model
- Click + symbol to include a Search Query, then use
chatMessage
- Use
Step 4: Update Chat Response Node
 Select the
 modelResponse (Click the + symbol to select the response from the RAG Node)
Part 4: Test & Deployment
Step 1: Test the Chat Widget
 Click the Test button to test the Node functionality.
Step 2: Deploy Chat Flow
Deploy your flow to make it accessible for chatbot integration. Monitor the logs in the logs section.
Step 3: Integrate Chat Widget
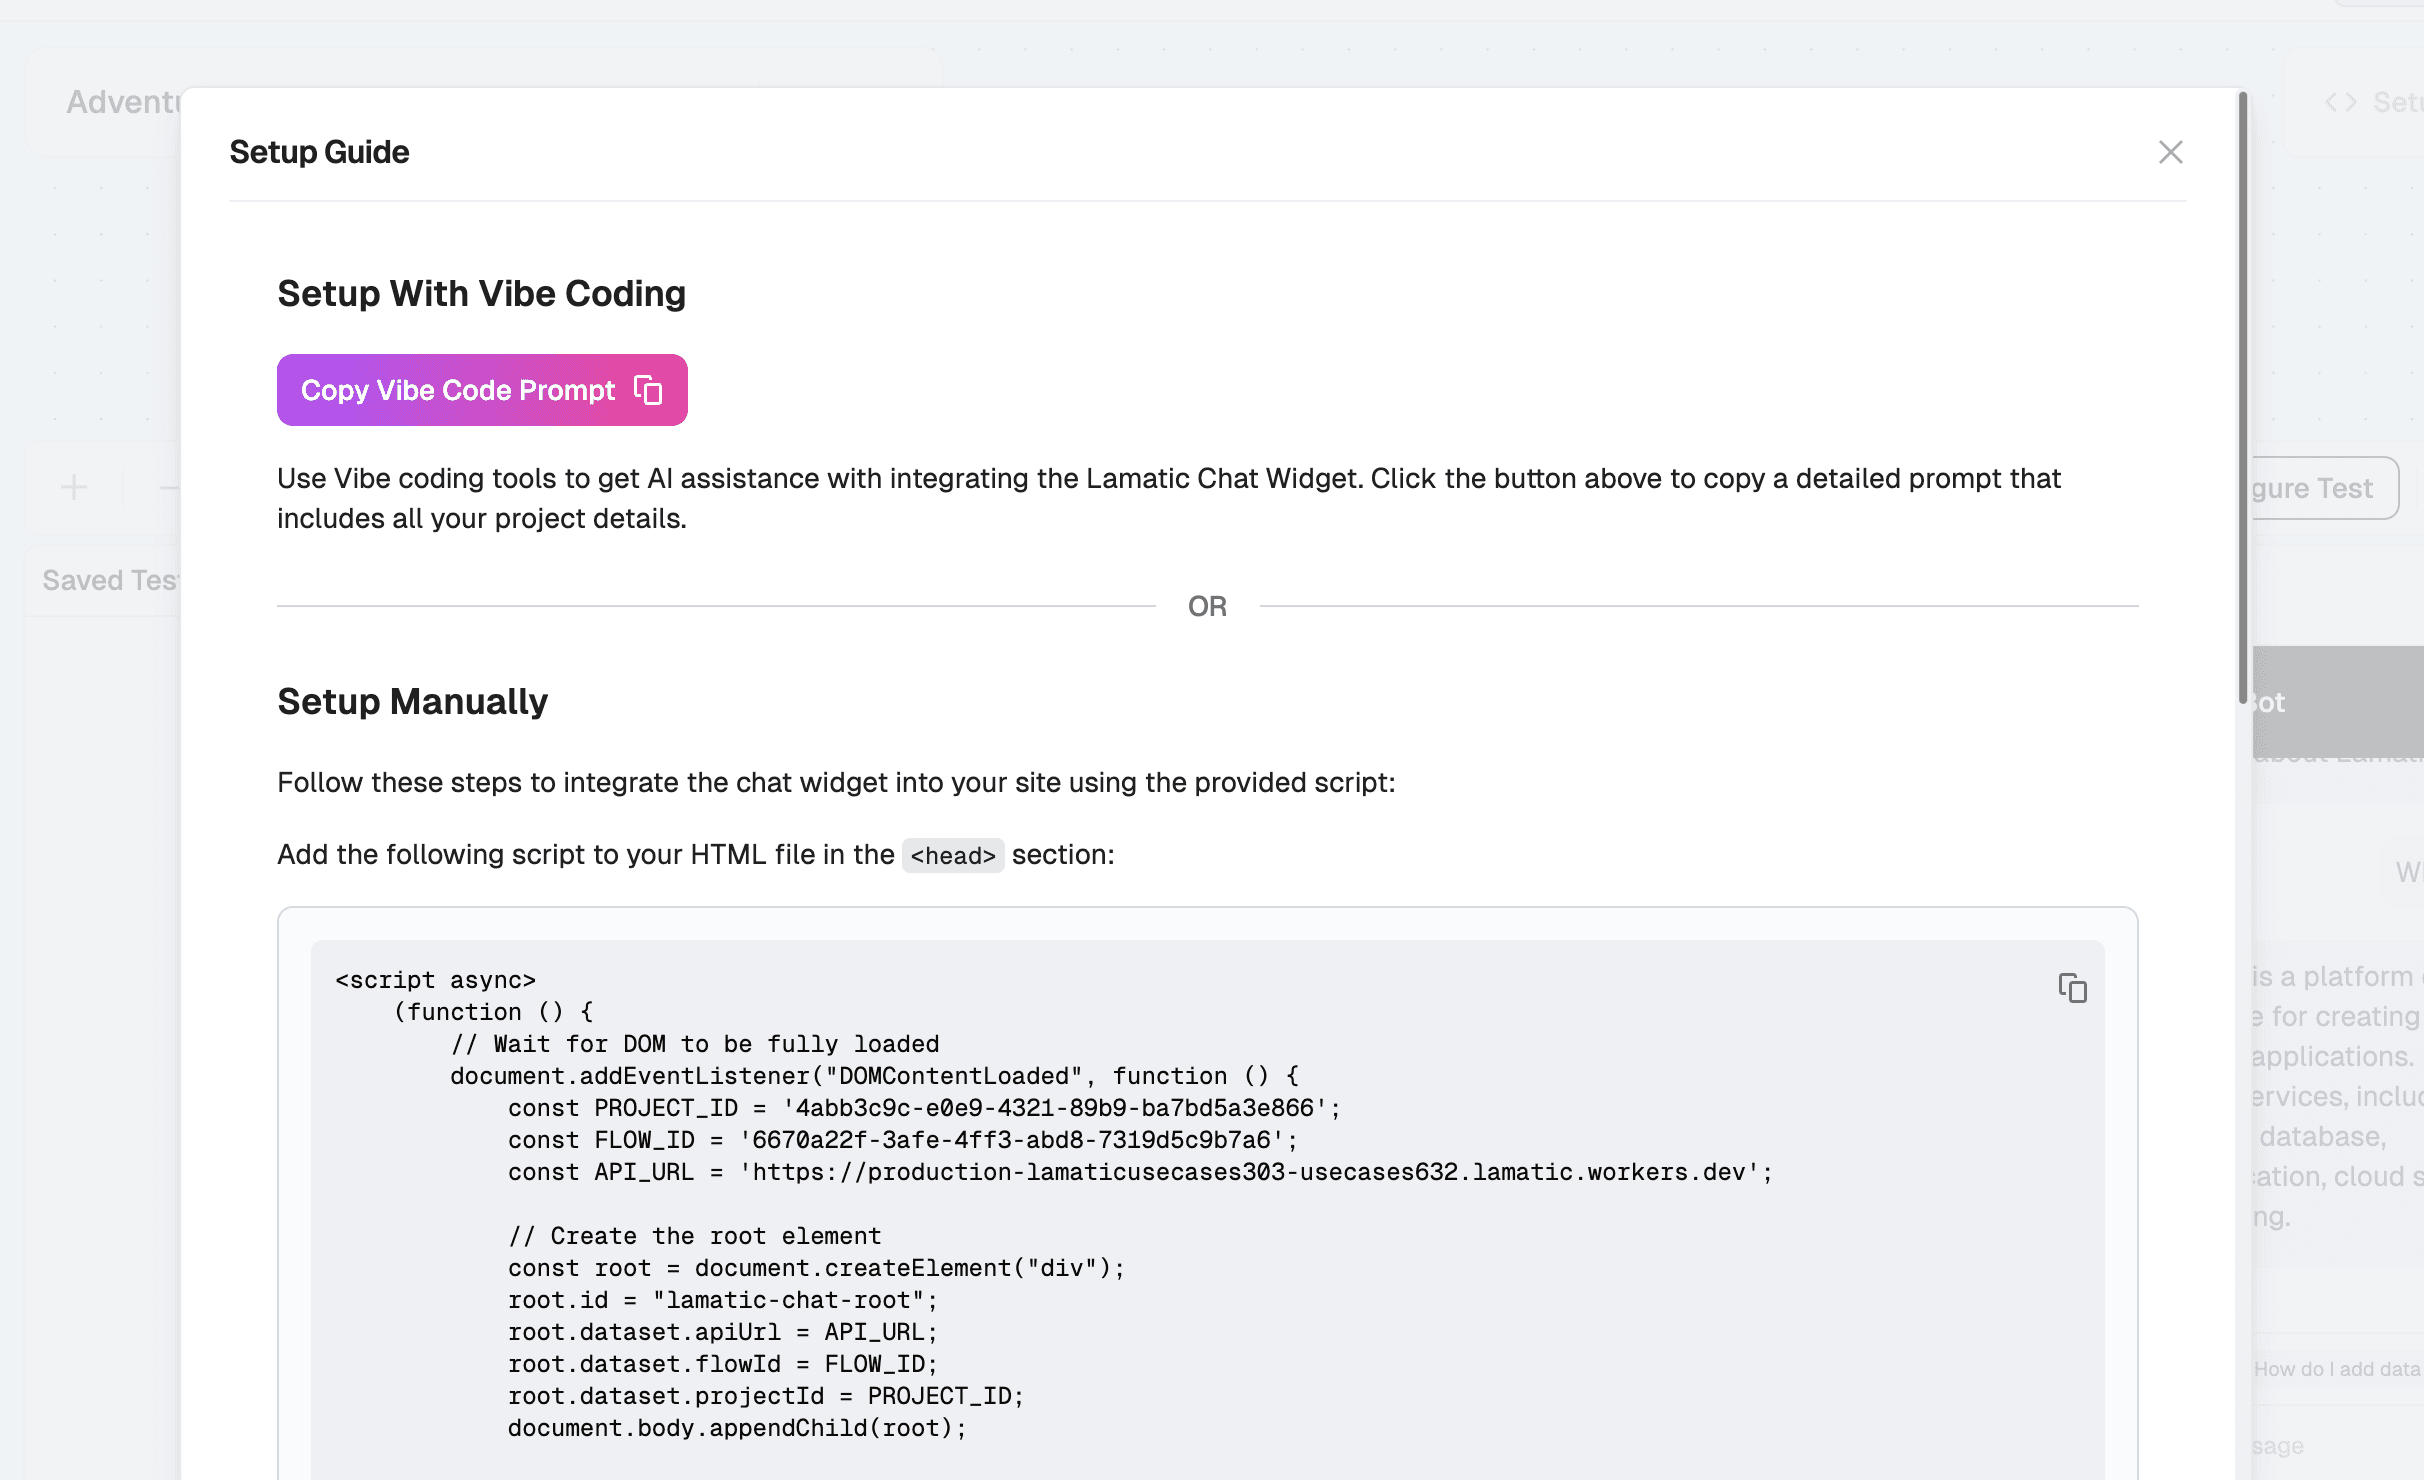
- Click the Setup button to access the integration code
- Copy the provided code snippet
- Paste it into your website
Ensure that the allowed domains are specified before integrating this chat widget into your website.
Troubleshooting
Common Issues
Node name mismatches: Node names may vary in your setup. Always check the actual node names in your flow and update the references accordingly.
Webhook not triggering: Ensure your GitHub Action YAML file is properly configured and the repository secrets are correctly set.
Chat widget not loading: Verify that your domain is added to the allowed domains list in the Chat Widget configuration.
Best Practices
- Use descriptive names for your flows and nodes
- Test each component individually before deploying
- Monitor logs regularly for any issues
- Keep your API keys secure and rotate them periodically